Whats a GIF?
|
GIF is "Graphics Interchange Format - Picture Format". It is a moving animation that you can create with Photoshop.
|

|
|
How to make your own Gif in Photoshop CS6
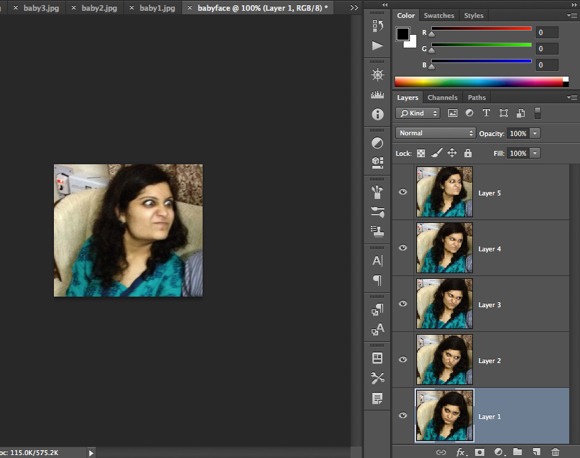
STEP ONE: The first thing you’re going to need to do is import all your images into separate layers in one Photoshop file. So if you have 6 images, for example, open all of them in Photoshop and then create a new file and copy and paste each of the images into a separate layer in the new file. Layer 1 should be your starting picture and the last layer should be the last picture in the animation.
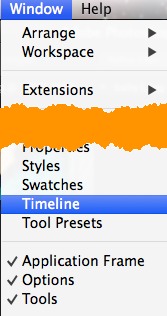
STEP TWO: The second step is to create the actual animation in Photoshop itself. In order to do this, you first have to open the Timeline window. Go up to Window and choose Timeline.
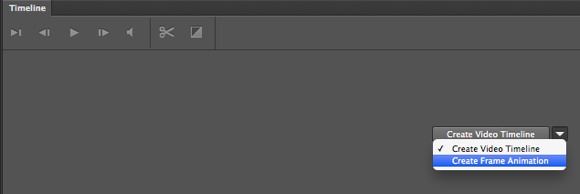
STEP THREE: Now you will see the Timeline window open at the bottom of the screen. It should be completely empty to start with. Now to create a frame animation, simply right-click anywhere in the Timeline box and choose Create Frame Animation.
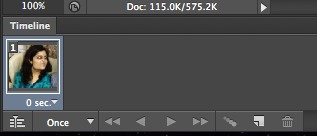
STEP FOUR: When you do this, you’ll now see only one image in the timeline with a small little 1 in the top left corner. It will either be the image you have selected in the Layers panel or it’ll be the most recently added layer (last image in the animation). At this point, it’s a one frame animation, which is not what we want.
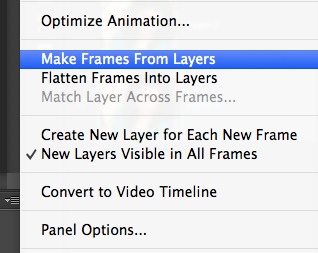
STEP FIVE: Instead, we want all the layers to be included in the animation. In order to do this, we have to click on the tiny little down arrow button at the far right of the Timeline window. It’s got a small down arrow and then a couple of horizontal lines next to it. when you click on that, you’ll see an option called Make Frames From Layers.
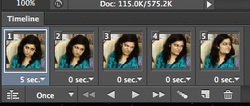
STEP SIX: Now you should see a frame for each layer that you have in your file. Each frame will also have a little drop down below the image that lets you select the length of time that each frame should be displayed.

STEP SEVEN: As you can see above, the first frame is 5 seconds and then the rest are set to 0. You will have to adjust them accordingly, but you can pick a custom amount of time also.
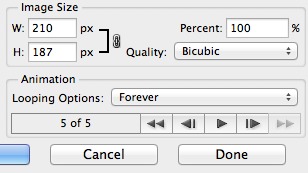
STEP EIGHT: Once you have selected the time for each frame, you’re ready for the final step, which is saving out your new animation to a GIF file. To do this, go to File and click on Save for Web. At the very bottom of the save dialog, you will see the Animation section, which should no longer be greyed out. Your options here are pretty easy to understand. You can really only choose how you want it to loop and then preview the animation before saving it. That’s about it! Hopefully this guide will help you create your animated GIF in Photoshop CS6 without a hitch!
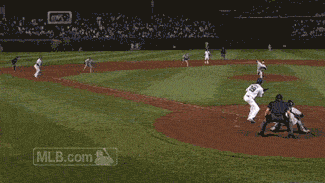
The Gifs I have created